Bow tie weave chain reaction Follow FizzicsEd 150 Science Experiments: Comments 0 You will need Lots of Wooden tongue depressors! Size needed is 150 x 17×1. 6 mm (the shorter stacks are harder to work with) Copyright Instruction Video Instruction 1 Place a tongue depressor vertically on a flat surface. Place two tongue depressors at 45 degrees on top of each other, with the axis of the two tongue depressors on top of the vertical one. It should form a ‘K’ shape. (Refer to the video at the bottom of this page to help you too!) 2 Place two more tongue depressors on top of the K shape made in step one, whereby these are again at an angle of 45 degrees pointing away from the vertical stick (you should see an almost equilateral triangular shape form from the vertical stick pointing sideways). Place your finger and hold it where the black rectangle is shown on the image… don’t let go! 3 Continue holding the point of the wooden sticks as shown in step 2 (don’t let go!). Carefully bend the ends of the two extra sticks that you just added underneath the vertical stick. In the image shown, the black rectangle shows what to do, whereas the red rectangle shows what NOT to do! 4 Your lattice of 5 sticks should look like this, but you should still be holding the connection at step 2. 5 Add two more sticks in an X shape to the right of the lattice you’ve made. Connect the two to the lattice as shown in the image. You’ll see that the wooden stick in the black square goes UNDER the previous stick. In the area show with the red square, the wooden stick in the middle of the image is OVER the previous stick. 6 Now add two more sticks below the ones you added in step 5. Place the ends of the sticks (highlighted with the green squares) underneath the previous sticks as shown in the image. Where the red square is shown, it doesn’t matter if the new stick is under or over the sticks shown in step 5. Keep your finger on the join shown with the black square or your chain reaction will go off! 7 Keep repeating steps 5 and 6, being sure to constantly hold the sticks together where you feel pressure (it will feel like the sticks want to pop up off the ground). It can be handy to use something heavy to hold the sticks in place every 50cm whilst making your bow tie lattice. 8 When locking off your bow tie weave, make sure that the connection shown under the green square has the vertical stick under the corner stick. At the middle of the vertical stick (shown under the black square), carefully push both ends of the sticks under the vertical stick. 9 Finished bow toe weave stick bomb. If you release the vertical stick, your bow tie stick bomb will explode! 10 Go further – buy 4 x student activity sheets as extension worksheets. This student science booklet has been created by experienced science educators from the Fizzics Education team. Use these student worksheets as blackline masters for your science class! See all student sheets here 11 Get the Unit of Work on Forces here! Push, pull Friction & spin! From inertia to centripetal force, this unit covers many concepts about Newton’s Laws! Includes cross-curricular teaching ideas, student quizzes, a sample marking rubric, scope & sequences & more 12 School science visits since 2004! – Curriculum-linked & award-winning incursions. – Over 40 primary & high school programs to choose from. – Designed by experienced educators. – Over 2 million students reached. – Face to face incursions & online programs available. – Early learning centre visits too! 13 Online courses for teachers & parents – Help students learn how science really works What is happening? Wooden sticks don’t want to be bent (they resist this). By weaving your wooden sticks together, you store potential energy in each stick. This pressure you would have been able to feel when holding the weave together (a bit like holding a stretched rubber band that is pulling inwards). As soon as you release on of the locking vertical sticks, the potential energy is released and you now have moving (kinetic) energy! The energy travels as a wave down your lattice as a chain reaction and will continue as long as you have sticks remaining. Classroom activity sheets for this experiment Create, reflect & extend! Try an alternate version of the cobra weave here! Learn more! Exploring Energy Years 3 to 6 Maximum 30 students School science workshop (NSW & VIC) 60 minutes Online Class Available Read More Enquire Now STEM Full Day Accelerator - Primary Designed from real classroom experiences, this modular day helps you create consistently effective science learning that directly address the new curriculum with easily accessible and cost-effective materials. Read More Enquire Now Hands-on Kids Science Party >20 hands on science experiments Gigantic bubbles Slime making Professional science show Read More Rubber band powered boat $10.95 inc. GST View Details Add to Cart Trustpilot
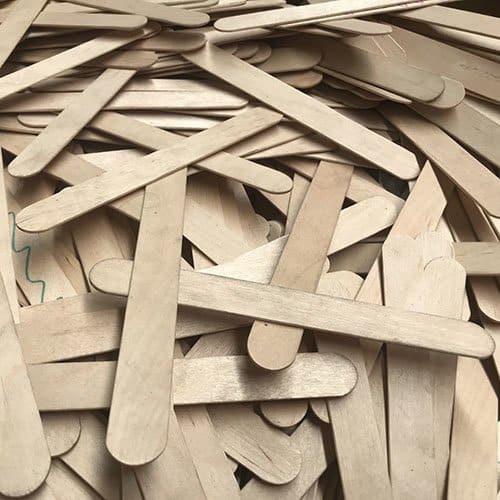
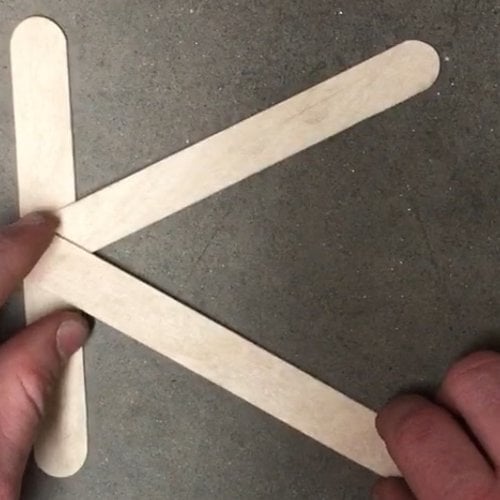
Place a tongue depressor vertically on a flat surface. Place two tongue depressors at 45 degrees on top of each other, with the axis of the two tongue depressors on top of the vertical one. It should form a ‘K’ shape. (Refer to the video at the bottom of this page to help you too!)
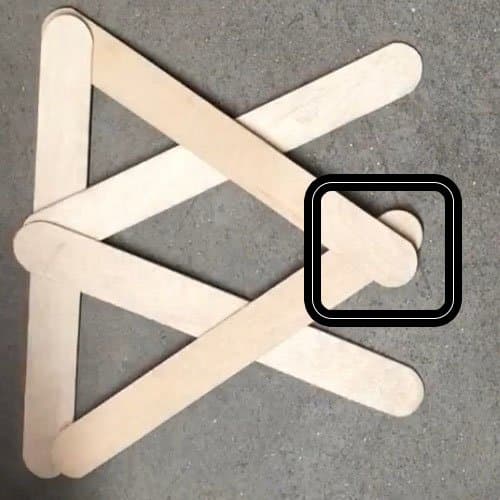
Place two more tongue depressors on top of the K shape made in step one, whereby these are again at an angle of 45 degrees pointing away from the vertical stick (you should see an almost equilateral triangular shape form from the vertical stick pointing sideways). Place your finger and hold it where the black rectangle is shown on the image… don’t let go!
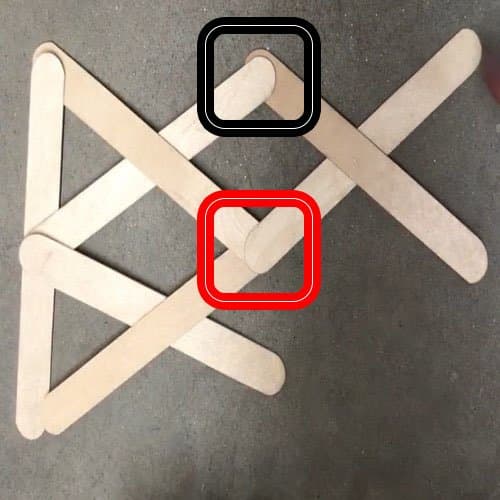
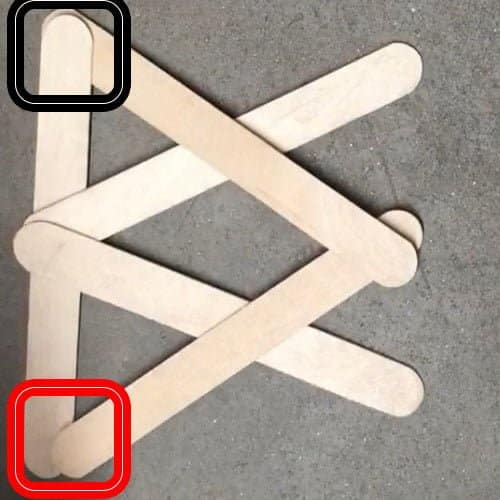
Continue holding the point of the wooden sticks as shown in step 2 (don’t let go!). Carefully bend the ends of the two extra sticks that you just added underneath the vertical stick. In the image shown, the black rectangle shows what to do, whereas the red rectangle shows what NOT to do!
Your lattice of 5 sticks should look like this, but you should still be holding the connection at step 2.
Add two more sticks in an X shape to the right of the lattice you’ve made. Connect the two to the lattice as shown in the image. You’ll see that the wooden stick in the black square goes UNDER the previous stick. In the area show with the red square, the wooden stick in the middle of the image is OVER the previous stick.
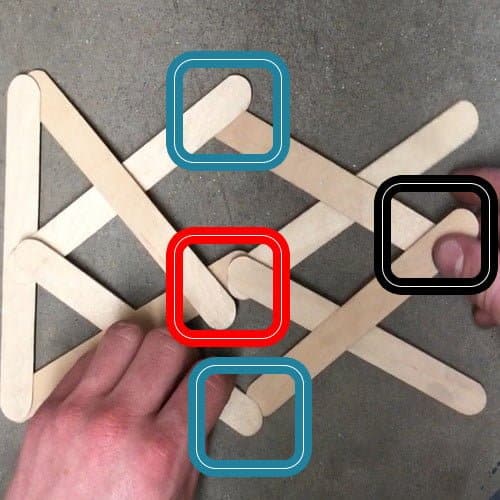
Now add two more sticks below the ones you added in step 5. Place the ends of the sticks (highlighted with the green squares) underneath the previous sticks as shown in the image. Where the red square is shown, it doesn’t matter if the new stick is under or over the sticks shown in step 5. Keep your finger on the join shown with the black square or your chain reaction will go off!
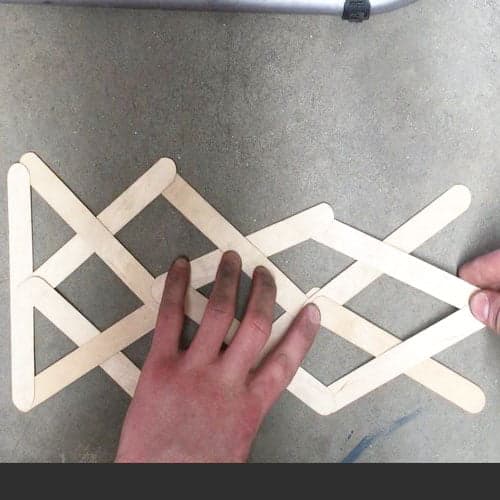
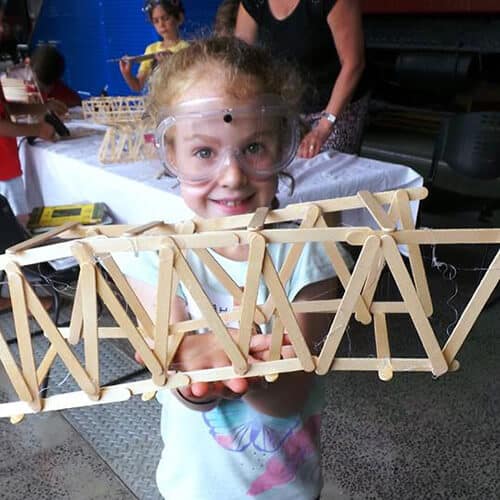
Keep repeating steps 5 and 6, being sure to constantly hold the sticks together where you feel pressure (it will feel like the sticks want to pop up off the ground). It can be handy to use something heavy to hold the sticks in place every 50cm whilst making your bow tie lattice.
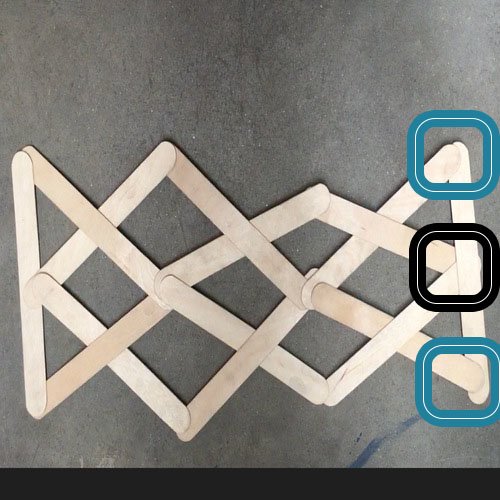
When locking off your bow tie weave, make sure that the connection shown under the green square has the vertical stick under the corner stick. At the middle of the vertical stick (shown under the black square), carefully push both ends of the sticks under the vertical stick.
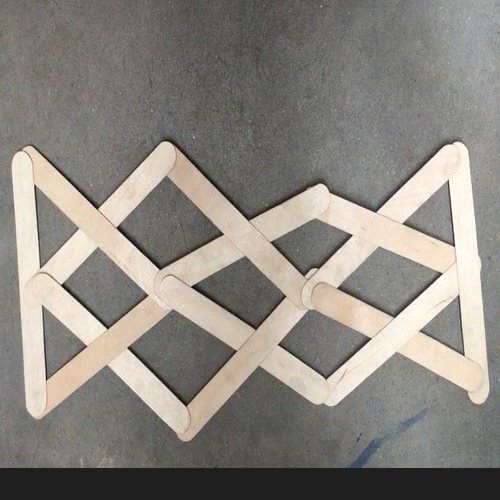
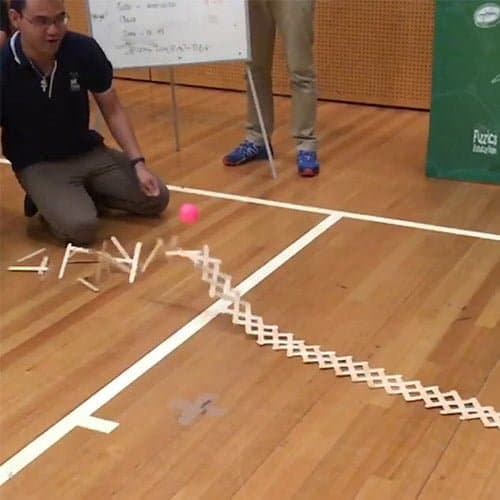
Finished bow toe weave stick bomb. If you release the vertical stick, your bow tie stick bomb will explode!
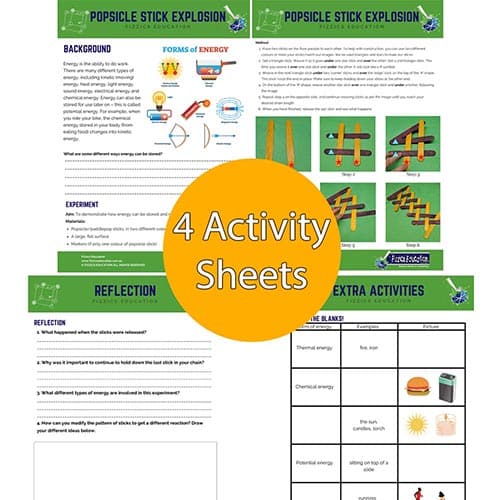
Go further – buy 4 x student activity sheets as extension worksheets. This student science booklet has been created by experienced science educators from the Fizzics Education team. Use these student worksheets as blackline masters for your science class! See all student sheets here
Get the Unit of Work on Forces here! Push, pull Friction & spin! From inertia to centripetal force, this unit covers many concepts about Newton’s Laws! Includes cross-curricular teaching ideas, student quizzes, a sample marking rubric, scope & sequences & more
School science visits since 2004! – Curriculum-linked & award-winning incursions. – Over 40 primary & high school programs to choose from. – Designed by experienced educators. – Over 2 million students reached. – Face to face incursions & online programs available. – Early learning centre visits too!
Exploring Energy Years 3 to 6 Maximum 30 students School science workshop (NSW & VIC) 60 minutes Online Class Available Read More Enquire Now
Years 3 to 6 Maximum 30 students School science workshop (NSW & VIC) 60 minutes Online Class Available
STEM Full Day Accelerator - Primary Designed from real classroom experiences, this modular day helps you create consistently effective science learning that directly address the new curriculum with easily accessible and cost-effective materials. Read More Enquire Now
Designed from real classroom experiences, this modular day helps you create consistently effective science learning that directly address the new curriculum with easily accessible and cost-effective materials.
Hands-on Kids Science Party >20 hands on science experiments Gigantic bubbles Slime making Professional science show Read More
This website uses cookies to improve user experience. By using our website you consent to all cookies in accordance with our Cookie Policy.
Thank you for looking to subscribing to our newsletter 🙂 Through this service you’ll be first to know about the newest free experiments, science news and special offers. PLUS: Get a free Kitchen Chemistry Booklet with >20 experiments, how to use variables plus a handy template!
Please fill out the details below and an email will be sent to you. Once you get that just click on the link to confirm your subscription and you're all done!