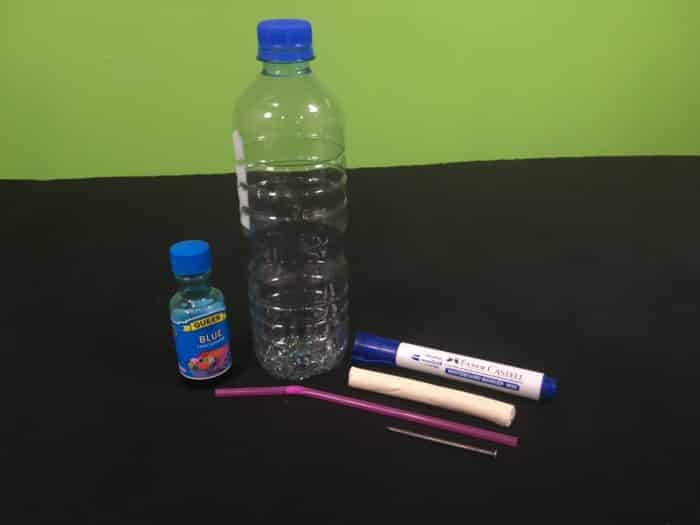
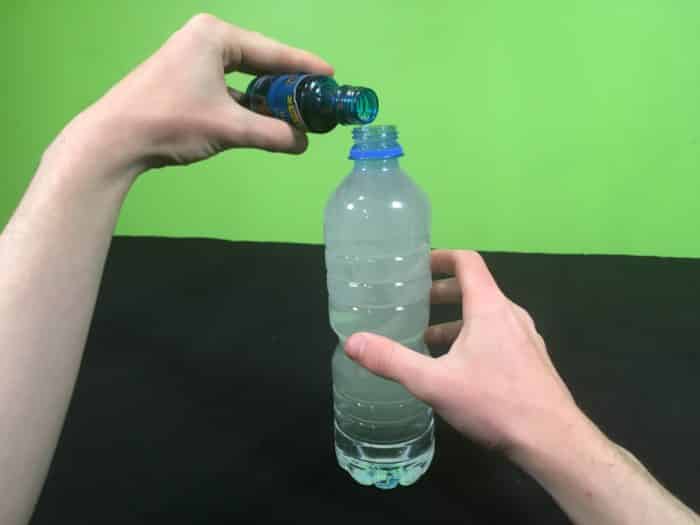
Make A Simple Thermometer Follow FizzicsEd 150 Science Experiments: Comments 0 You will need: One Screw top container One Clear Straw Something to make a hole with eg. nail or hand drill Food Colouring Hot water bath, ice bath and hair dryer (Optional) Moulding clay and a permanent marker Balloons or Water Balloons (Options available also Blu-Tak or Plasticine) Container Scissors Straw Adult Help. Copyright Instruction Video Instruction 1 Carefully, and with the help of an adult, bore a hole into the middle of the containers’ lid. Make sure that the hole made is only slightly bigger than the diameter of your straw. SAFETY: If children are to do this, make sure that the hand drills are not electrically powered. Alternatively, hand drill the lids prior to children commencing the experiment or use balloons instead of a plastic lid. ALTERNATE VERSION: Use a bottle that already has a small opening (e.g. soft drink bottle) or Use balloon or water balloon. 2 Thread the straw through the hole and seal the joint with the moulding clay (Important: Roll the moulding clay around the edge of the lid making sure of a good airtight seal. You can also use a balloon with a hole in it to make a tight seal around the straw and bottle opening. 3 Fill your container to the brim with water and add in a couple of drops of food colouring. 4 Gently blow into the straw – blowing hard may cause the water to rush up into your face! 5 Blowing into the straw forces air into an enclosed space, thereby increasing the pressure within the container. If your seals are airtight, you will find that water will rise up the straw once you stop blowing. This may require some trouble shooting! 6 Mark the water level on the straw with the marker – this mark identifies where the water will be when at room temperature. 7 Now hold the container between your hands, thereby gently heating the water inside. Alternatively you can use the hot water bath or even a hairdryer. If all has gone well you will find that the water will have travelled up the straw. SAFETY: Using electrical appliances near water can be dangerous, please have an adult demonstrate this experiment. 8 Now try placing the home made thermometer into an ice bath, what will happen to the water? 9 School science visits since 2004! – Curriculum-linked & award-winning incursions. – Over 40 primary & high school programs to choose from. – Designed by experienced educators. – Over 2 million students reached. – Face to face incursions & online programs available. – Early learning centre visits too! 10 Get the Unit of Work on Heat Energy here! What actually is heat? How does heat move through different materials? How does heat change the properties of materials and more! Includes cross-curricular teaching ideas, student quizzes, a sample marking rubric, scope & sequences & more 11 Online courses for teachers & parents – Help students learn how science really works Why Does This Happen? When liquids are heated they expand. Knowing that water expands when heated helps scientists to model the movement of ocean currents around the world. This same principle is used in the everyday mercury thermometer. Mercury is used within thermometers as it is liquid at -39oC and expands rapidly when heated, as well as that its convex meniscus allows for accurate temperature readings. Variables to test More on variables here Can you make a thermometer with a wider straw? What happens if you change the liquid to an oil or methylated spirits? Safety: Do not expose the methylated spirits to any temperature beyond that created by the Sun. Learn more!! From colour changes to slimy science, we’ve got your kitchen chemistry covered! Get in touch with FizzicsEd to find out how we can work with your class. Hot & Cold Workshop Years 1 to 6 Maximum 30 students School workshop (NSW & VIC) 60 or 90 minutes Online Class Available Read More Enquire Now Sunprint Kit $16.45 excl. GST View Details Add to Cart Trustpilot STEM Full Day Accelerator - Primary Designed from real classroom experiences, this modular day helps you create consistently effective science learning that directly address the new curriculum with easily accessible and cost-effective materials. Read More Enquire Now Be Amazing! How to teach science, the way primary kids love. $29.95 excl. GST View Details Add to Cart Trustpilot
Carefully, and with the help of an adult, bore a hole into the middle of the containers’ lid. Make sure that the hole made is only slightly bigger than the diameter of your straw. SAFETY: If children are to do this, make sure that the hand drills are not electrically powered. Alternatively, hand drill the lids prior to children commencing the experiment or use balloons instead of a plastic lid. ALTERNATE VERSION: Use a bottle that already has a small opening (e.g. soft drink bottle) or Use balloon or water balloon.
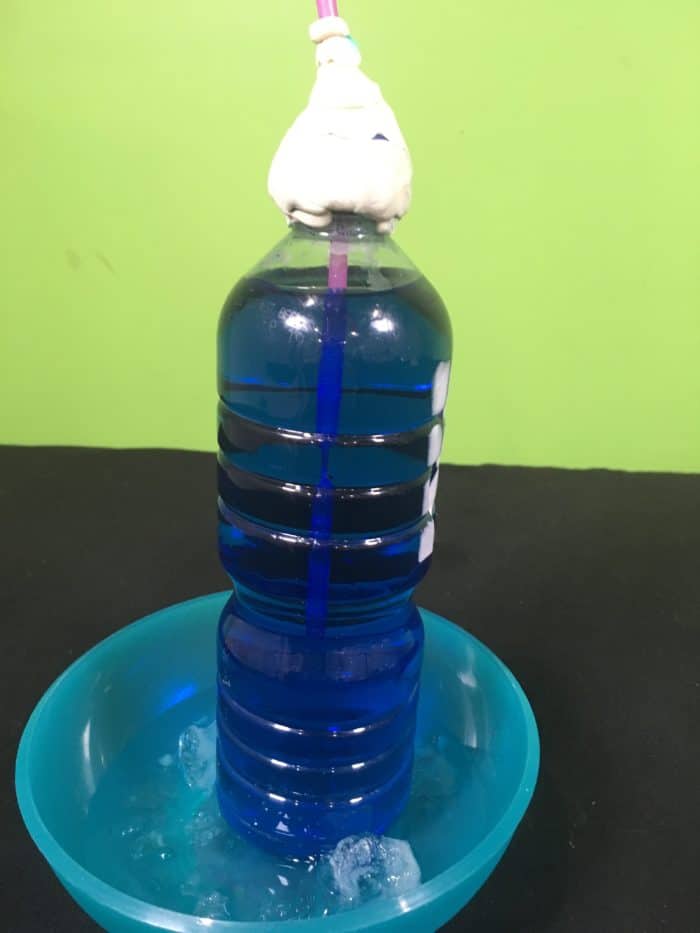
Thread the straw through the hole and seal the joint with the moulding clay (Important: Roll the moulding clay around the edge of the lid making sure of a good airtight seal. You can also use a balloon with a hole in it to make a tight seal around the straw and bottle opening.
Blowing into the straw forces air into an enclosed space, thereby increasing the pressure within the container. If your seals are airtight, you will find that water will rise up the straw once you stop blowing. This may require some trouble shooting!
Mark the water level on the straw with the marker – this mark identifies where the water will be when at room temperature.
Now hold the container between your hands, thereby gently heating the water inside. Alternatively you can use the hot water bath or even a hairdryer. If all has gone well you will find that the water will have travelled up the straw. SAFETY: Using electrical appliances near water can be dangerous, please have an adult demonstrate this experiment.
School science visits since 2004! – Curriculum-linked & award-winning incursions. – Over 40 primary & high school programs to choose from. – Designed by experienced educators. – Over 2 million students reached. – Face to face incursions & online programs available. – Early learning centre visits too!
Get the Unit of Work on Heat Energy here! What actually is heat? How does heat move through different materials? How does heat change the properties of materials and more! Includes cross-curricular teaching ideas, student quizzes, a sample marking rubric, scope & sequences & more
From colour changes to slimy science, we’ve got your kitchen chemistry covered! Get in touch with FizzicsEd to find out how we can work with your class.
Hot & Cold Workshop Years 1 to 6 Maximum 30 students School workshop (NSW & VIC) 60 or 90 minutes Online Class Available Read More Enquire Now
STEM Full Day Accelerator - Primary Designed from real classroom experiences, this modular day helps you create consistently effective science learning that directly address the new curriculum with easily accessible and cost-effective materials. Read More Enquire Now
Designed from real classroom experiences, this modular day helps you create consistently effective science learning that directly address the new curriculum with easily accessible and cost-effective materials.
Be Amazing! How to teach science, the way primary kids love. $29.95 excl. GST View Details Add to Cart Trustpilot
This website uses cookies to improve user experience. By using our website you consent to all cookies in accordance with our Cookie Policy.
Thank you for looking to subscribing to our newsletter 🙂 Through this service you’ll be first to know about the newest free experiments, science news and special offers. PLUS: Get a free Kitchen Chemistry Booklet with >20 experiments, how to use variables plus a handy template!
Please fill out the details below and an email will be sent to you. Once you get that just click on the link to confirm your subscription and you're all done!