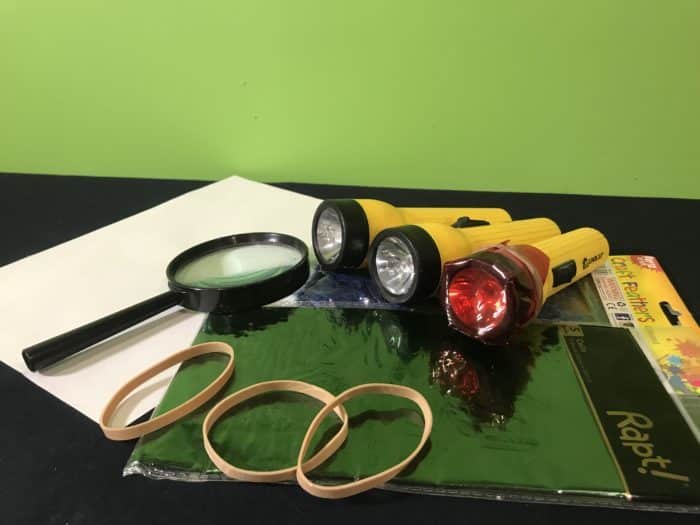
You Will Need:
- Three Strong flashlights.
- Red, blue and green cellophane
- Three rubber bands
- A clean whiteboard or wall
- A dark room
- Optional: A magnifier for focussing the light.
Note: If you can get your hands on some red, green and blue spotlights, use them instead of the torch and cellophane.
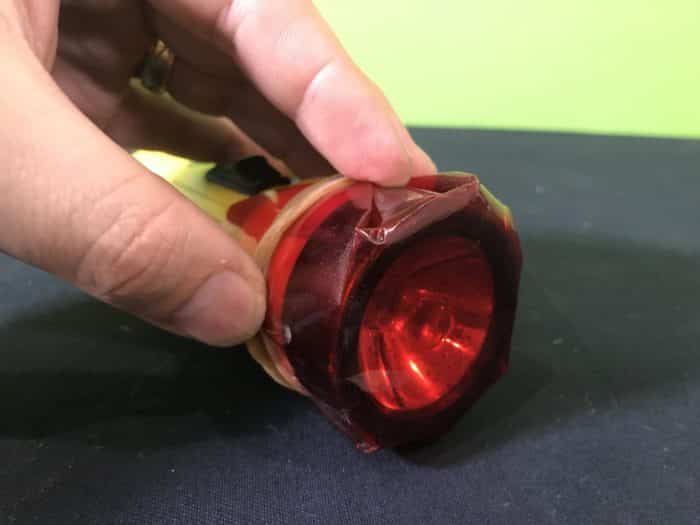
Place the red cellophane over the flashlight so that the light is coloured red. Secure with a rubber band.
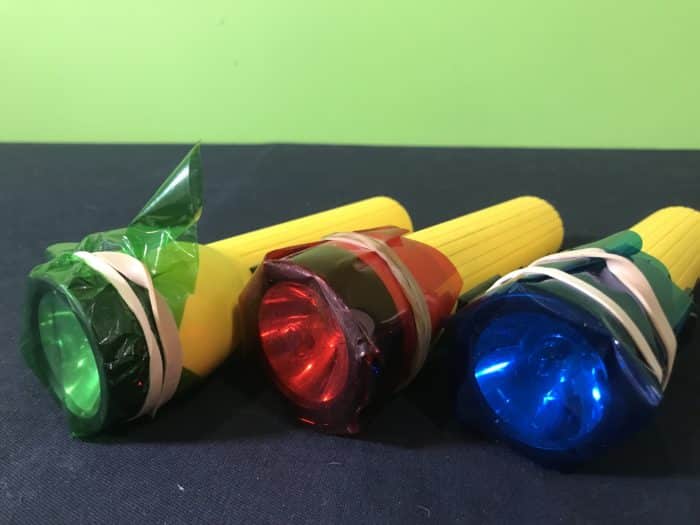
Repeat the process, so that you have a ‘green flashlight’ a ‘blue flashlight’ and a ‘red flashlight’ to use.
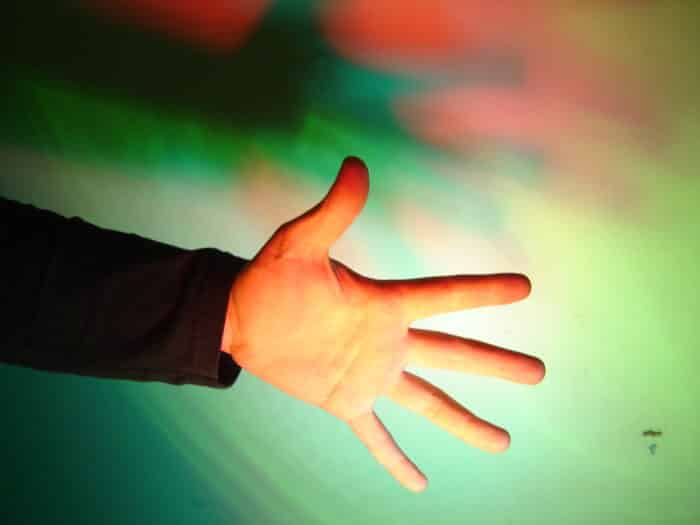
Shine all of the flashlights onto the wall, angle all the torches until you see a faint white light on the wall. Try placing objects in front of the lights to make shadows. What colours do you make? Why?
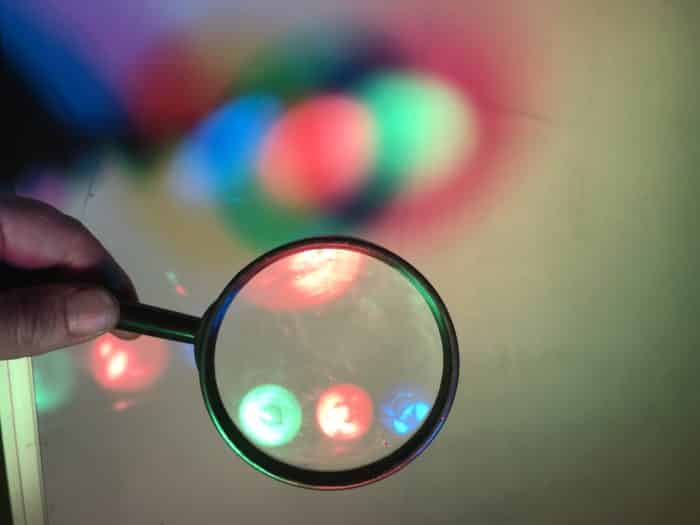
Try placing a magnifier into the lights to form an image on the white screen of the lamps! As you move the magnifier closer to the white screen you should be able to show that the individual coloured light images converge and then mix together.
School science visits since 2004!
– Curriculum-linked & award-winning incursions.
– Over 40 primary & high school programs to choose from.
– Designed by experienced educators.
– Over 2 million students reached.
– Face to face incursions & online programs available.
– Early learning centre visits too!
![]()
Online courses for teachers & parents
– Help students learn how science really works
![]()
Get the Unit of Work on Light & Colour here!
- What is colour addition vs subtraction?
- What is opacity, translucence & transparency?
- What is the difference between refraction & reflection?
- Explore UV light, lenses, thermochromism and more!
Includes cross-curricular teaching ideas, student quizzes, a sample marking rubric, scope & sequences & more
![]()
Why does this work?
White light is comprised of all of the colours of the rainbow i.e. the light spectrum.
It is very easy to see this using a glass prism, just like Sir Isaac Newton did in the 1600s.
Combining the three different colours should have produced a small white area on the wall.
This is called colour addition i.e. adding up to white light. You used red, green and blue light as they are the primary colours of light.
Your object creates areas where the light from each flashlight cannot pass.
As each flashlight is shining from a different angle some light can still reach the wall, creating coloured shadows. Try pointing a rod or stick in the middle of the focused 3 lights… you should see a magenta, cyan and yellow colour which are the secondary colours formed from the red, blue and green primary colours of light.
Variables to test
- Try different coloured cellophane filters.
- Try shining the coloured lights on walls that have different colours.
Video from Facebook Live
Join us on our Facebook site for live science presentations!

From image formation to rainbow science, we’ve got your unit on light covered!
Get in touch with FizzicsEd to find out how we can work with your class.
![]()
Light & Colour
Years 1 to 6
Maximum 30 students
Workshop or Show (NSW & VIC)
60 or 90 minutes
Online Class Available
STEM Full Day Accelerator - Primary
Designed from real classroom experiences, this modular day helps you create consistently effective science learning that directly address the new curriculum with easily accessible and cost-effective materials.


Quick question…
Even though I had a watch on the facebook live video… I am still kinda confused on how you get coloured lights. I tried this experiment and it was awesome! some understanding would be great! thanks.
Hi! There is quite a deep explanation when it comes to exactly why combinations of colours produce other colours.
This has to do with the different light wavelengths combining to form a new wavelength of light that you then see.
– Further details via UNSW
– Check out this java simluation on combining light wavelengths!
Hope this helps!