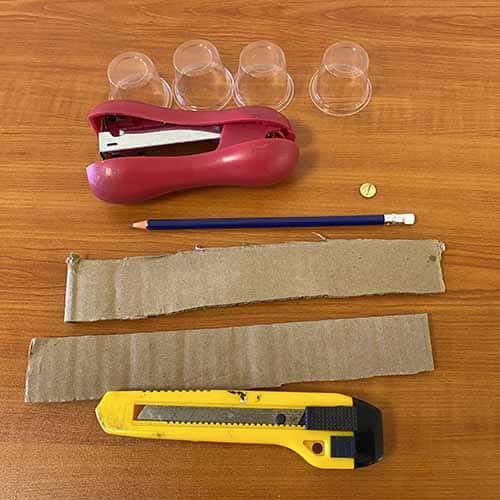
You will need:
- 4 plastic cups (we used 30mL biodegradable cups)
- A sharp pencil
- Two cardboard strips (at least 20 x 3cm each)
- Stapler
- A boxcutter & adult help
- Thumbtack (optional)
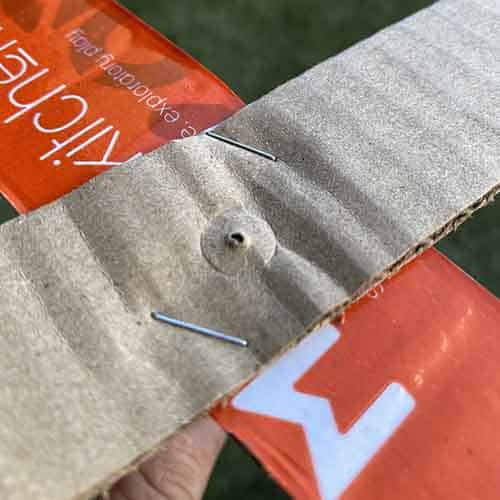
Form the two cardboard strips into a cross. Use at least two staples to join them together.
Optional: You can use the thumbtack to make a small hole through the middle of the cardboard strips.
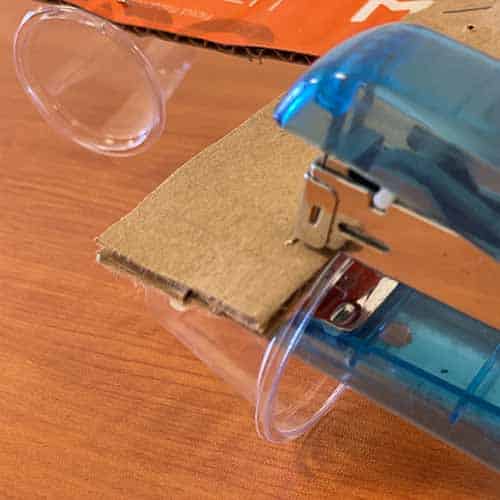
Use the stapler to attach a plastic cup on the end of each strip of cardboard.
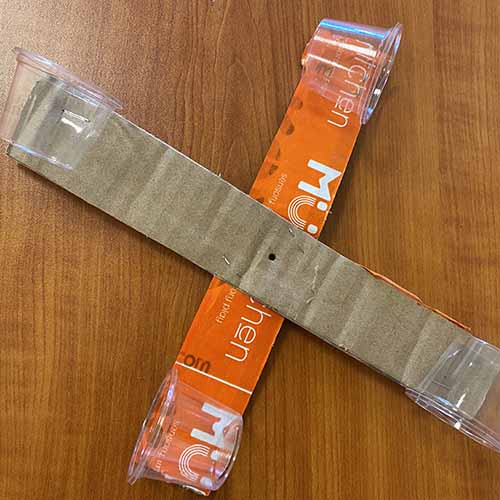
Make sure that the plastic cups are all facing the same way.

Push the pencil into the centre of the cardboard cross.
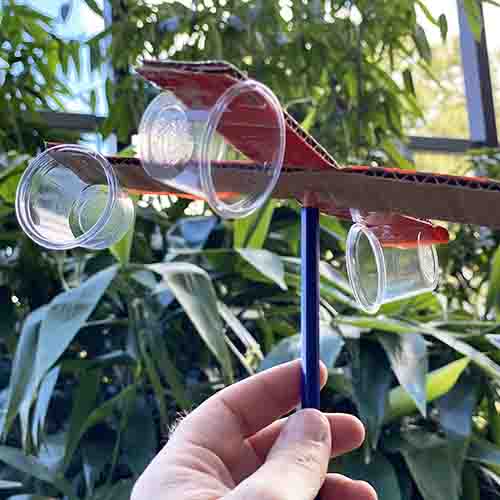
Take the anemometer out into a breeze and see if it spins!
Extra tip: Colour one of the cups so that you can count it every time it passes in front of you.
School science visits since 2004!
![]()
Online courses for teachers & parents
– Help students learn how science really works
![]()

Get the Unit of Work on Pressure here!
- Want to dive into air pressure?
- It’s all about air pressure in many ways!
From how storms form to how planes fly, this unit covers many concepts about air pressure.
Includes cross-curricular teaching ideas, student quizzes, a sample marking rubric, scope & sequences & more
![]()
What is going on?
The stronger the wind, the faster your anemometer moves!
Design
In this design, the friction between the pencil and the cardboard strips does cause the anemometer to not spin as fast as it could. Can you design a better version? Share your ideas below!
Variables to investigate
- Can you reduce the friction between the pencil and the cardboard?
- What happens if you increase the cup size?
Measure the wind speed
- Measure the length of one cardboard arm that holds a cup.
This is the radius of the circle that the cups travel around.
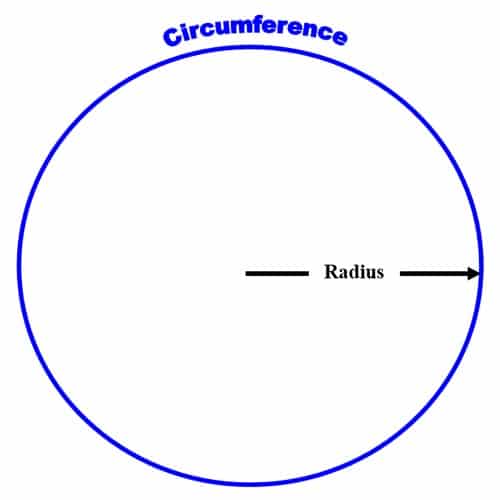
- Work out the circle circumference of the travelling cups by using the formula below:Circumference = 2 x Pi x radius (where Pi = 3.14 as an approximation)
- Count the number of revolutions in one minute (rpm)
- Substitute your answers into the formula below to work out the wind speed of your anemometer:Wind speed (km/hr) = (rpm x circumference x 60 minutes) / 1000 meters
Worked example
Eg: If an anemometer spins 90 times in 1 minute, and it has a measured circumference of 1 metre…
Wind speed (km/hr) = 90 rpm x 1 meter x 60 minutes / 1000 metres
= 5.4 km per hour
How can you measure wind speed without an anemometer?
The Beaufort scale is a way that you can roughly work out the wind speed based on what you can see happening in the environment around you.

It’s all about pressure!
- Teaching about air pressure? Check out the Flight or Weather show!
- Teaching about Newton’s laws? Check out the Forces, Friction & Movement workshop!
Get in touch with FizzicsEd to find out how we can work with your class.
![]()
Flight or Weather
Years 3 to 6
Maximum 30 students
School science show (NSW & VIC)
60 minutes
Online Class Available
Forces, Friction & Movement
Years K to 6
Maximum 30 students
School workshop
60 or 90 minutes
Online Class Available
STEM Full Day Accelerator - Primary
Designed from real classroom experiences, this modular day helps you create consistently effective science learning that directly address the new curriculum with easily accessible and cost-effective materials.


Comments