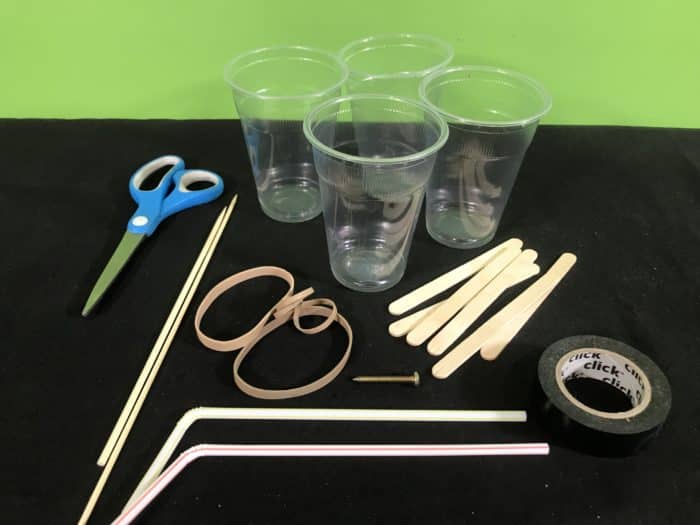
You will need:
- Six ice-cream sticks (paddle pop sticks)
- Three thin rubber bands
- Two wooden kebab sticks
- Two plastic drinking straws
- Four plastic cups
- Sticky tape (we used black insulation tape so you can see the joins more clearly)
- Scissors
- A sharp knife or metal screw (adult use only)
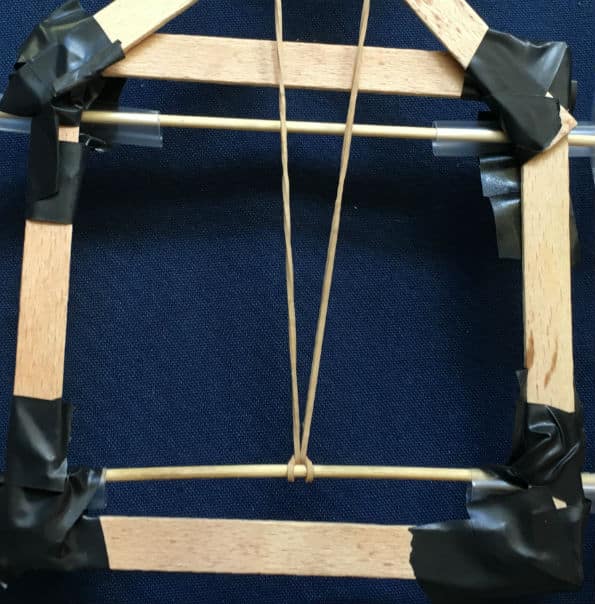
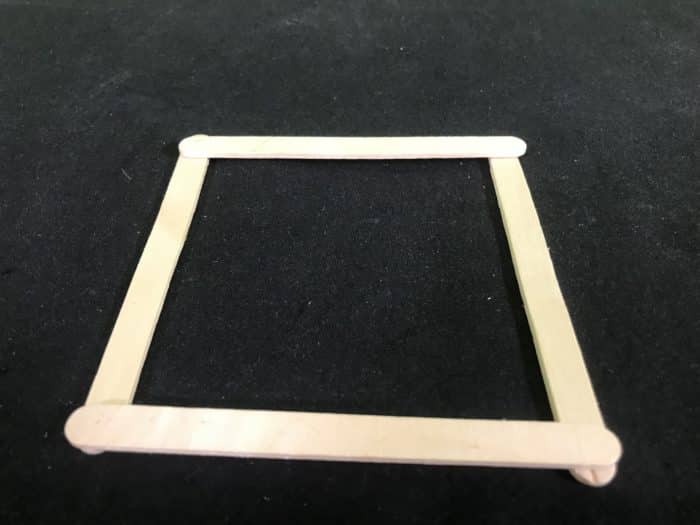
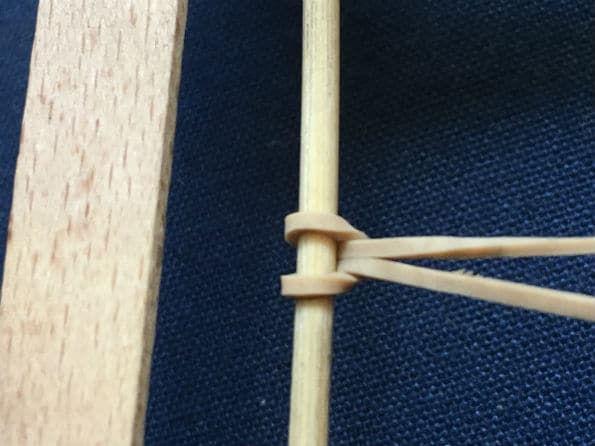
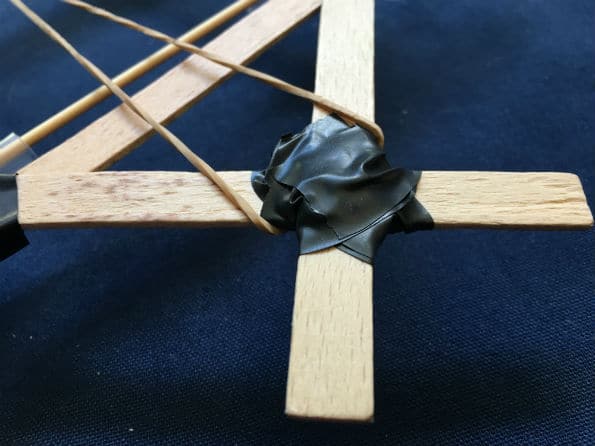
“Wooden square with straws and kebab sticks in place… see how the rubber band is able to attach easily?”
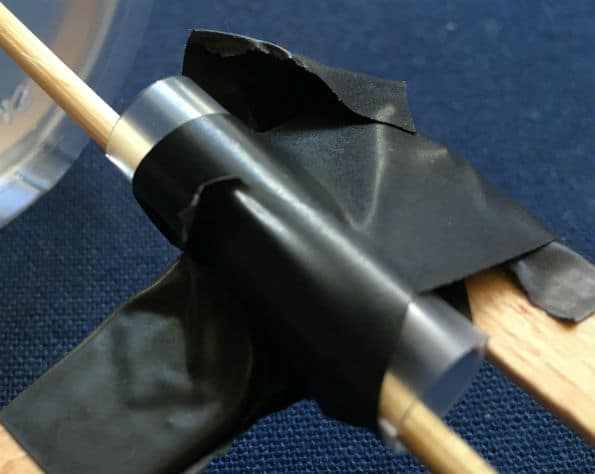
Using scissors, cut your straw into four small pieces and secure these near the corners of the square you created. Make sure that there is at least 20 mm of distance from the end of the square edges so that your axle can have its rubber band fitted more easily. Thread the two kebab sticks through the straws as shown below.
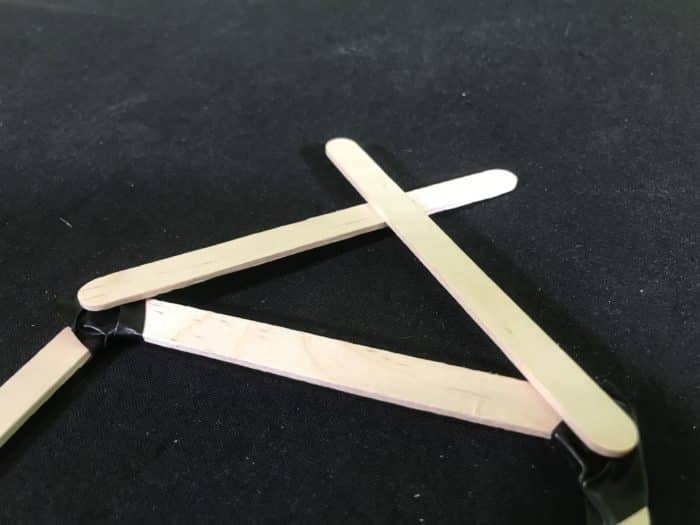
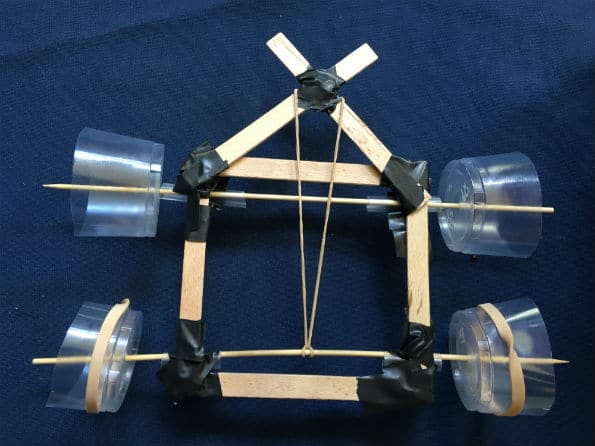
Use the remaining two wooden sticks and one side of the ice-cream stick square, to create a triangular shaped front end for your rubber band racer. Make sure that the two wooden sticks form that a small ‘cross’ at the front of your racer. Make sure that you can hook your rubber band over the front easily. As before, you should overlap the wooden sticks and secure strongly with sticky tape.
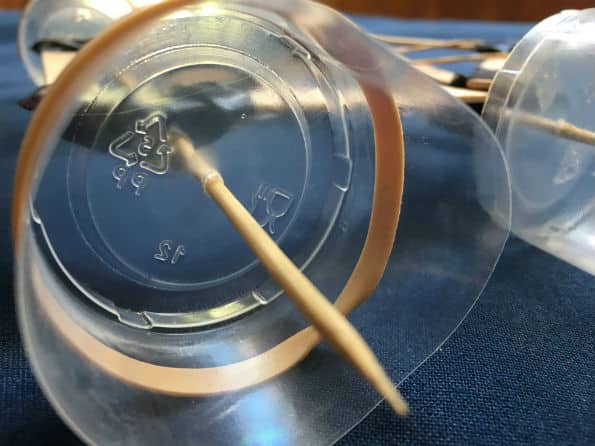
“A Kebab stick through the base of a plastic cup on the rear axle.”
Get an adult to create a small hole in the centre of each of the four plastic cups so that the kebab stick can only just pass through the base of each cup, make the hole fit tightly around the kebab sticks. Use the scissors to cut down each cup so that they look like four small wheels. Attach the cup bases as shown below and add rubber bands around the outside to give the rear wheels some extra grip.
School science visits since 2004!
– Curriculum-linked & award-winning incursions.
– Over 40 primary & high school programs to choose from.
– Designed by experienced educators.
– Over 2 million students reached.
– Face to face incursions & online programs available.
– Early learning centre visits too!
Why Does This Happen
This science experiment applies multiple ideas in classical physics, all in one fun little STEM challenge!
Firstly, by pulling back the rubber band racer you stretch the rubber band, thereby storing energy, also known as potential energy.
When you let the rubber band racer go, the stored energy in the tension of the rubber band is released and is transferred to the rear axle, an application of the first law of thermodynamics. Also known as the Law of Conservation of Energy whereby energy cannot be created or destroyed in an isolated system.
As the rear axle spins, the rear wheels grip the floor and push backwards which then sends the rubber band racer forwards! A classic way of demonstrating Newton’s 3rd Law of motion which states that for every action there is an equal and opposite reaction.
Road safety application
You need friction to move forwards just as much as you need friction to stop. Tyres provide that friction on the ground that you need to control your vehicle and make it stop in time, just as much as they transfer force backwards to send your vehicle forwards. Regularly check your tyre treads to ensure there is enough tread to disperse water allowing your tyre to still have friction on the ground in wet conditions.
Variables to try
- Try different floor surfaces… is carpet better than tiles for example?
- How far will the car travel if you pull it backwards set distances (is the relationship linear?).
- Does a different size rubber band make the rubber band racer go further?
- Can you create a different wooden stick arrangement to add another rubber band to the racer? Does this make a difference to the speed and final distance achieved?
- Teaching about air pressure? Check out the Flight or Weather show!
- Teaching about Newton’s laws? Check out the Forces, Friction & Movement workshop!
Get in touch with FizzicsEd to find out how we can work with your class.
Forces, Friction & Movement
Years K to 6
Maximum 30 students
School workshop
60 or 90 minutes
Online Class Available
STEM Full Day Accelerator - Primary
Designed from real classroom experiences, this modular day helps you create consistently effective science learning that directly address the new curriculum with easily accessible and cost-effective materials.








cool rubber band racer
Glad you like it! Let us know if you modify the design to make it better 🙂
I really enjoyed this.
We’re glad that you liked this science activity Valerie!