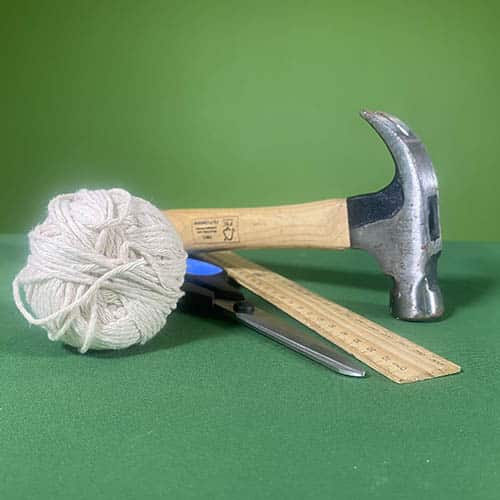
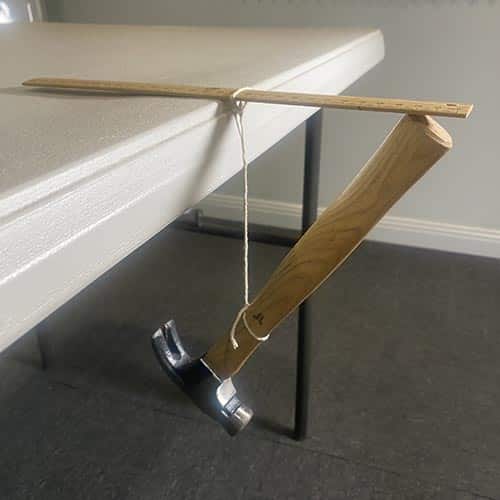
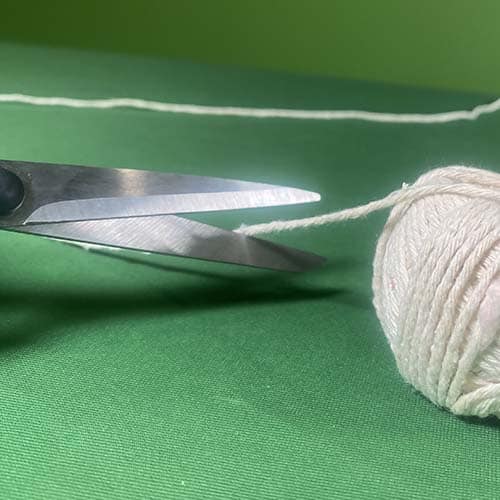
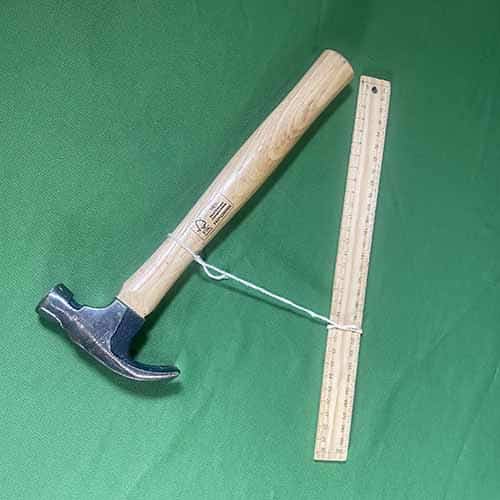
Balancing hammer on ruler Follow FizzicsEd 150 Science Experiments: Comments 0 You will need: A hammer (make sure that the handle is tapered towards the head of the hammer) String A ruler A desk Scissors Copyright Instruction 1 Cut about 20 cm of the string with your scissors. 2 Tie one end of the string tightly around the hammer handle. Make sure that the string can’t slip off the handle. 3 Tie the other end of the string to your ruler. 4 Firstly, check that the floor under your table can handle the hammer to fall on it without breaking. You don’t want to break your kitchen tiles or dent a wooden floor! Resting the hammer handle on towards the tip of the ruler, place the hammer’s head under the desk and the other end of the ruler on the desk surface. Whilst supporting the hammer, slide the string along the ruler until you can feel that the ruler can support the hammer’s weight. Carefully take your hand away from under the hammer and you should find that your contraption balances itself! Going further How far can you move the ruler towards the end of the desk? Do you have to adjust the string’s placement? Why? 5 Get the Unit of Work on Forces here! Push, pull Friction & spin! From inertia to centripetal force, this unit covers many concepts about Newton’s Laws! Includes cross-curricular teaching ideas, student quizzes, a sample marking rubric, scope & sequences & more 6 School science visits since 2004! – Curriculum-linked & award-winning incursions. – Over 40 primary & high school programs to choose from. – Designed by experienced educators. – Over 2 million students reached. – Face to face incursions & online programs available. – Early learning centre visits too! 7 Online courses for teachers & parents – Help students learn how science really works What is going on? You found the centre of balance! The weight of the hammer’s head pulled downwards on the ruler end. You would expect that this would make the ruler fall of the table, however that force was transferred back towards the table. As gravity pulls down on the hammer’s head, the handle pushes back upwards on the ruler (you can think of it like a see-saw, where one side goes down and the other side goes up). The string helps this to happen as it acts as fulcrum or pivot point for the hammer to turn on. By having the majority of the weight of the hammer underneath the table, you were able to balance the hammer as the centre of balance of the whole contraption is under the table rather than off to the side of the table. Variables to test What happens if you use a flexible ruler? Can you use different length strings? What about different size and shape hammers? Learn more! Forces, Friction & Movement Years K to 6 Maximum 30 students School workshop 60 or 90 minutes Online Class Available Read More Enquire Now Be Amazing! How to teach science, the way primary kids love. $29.95 inc. GST View Details Add to Cart Trustpilot STEM Full Day Accelerator - Primary Designed from real classroom experiences, this modular day helps you create consistently effective science learning that directly address the new curriculum with easily accessible and cost-effective materials. Read More Enquire Now Hands-on Kids Science Party >20 hands on science experiments Gigantic bubbles Slime making Professional science show Read More
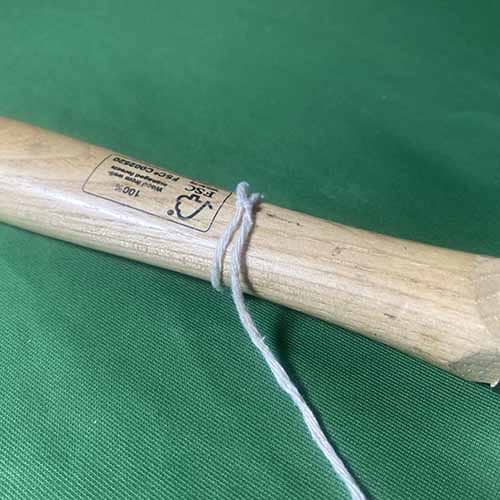
Tie one end of the string tightly around the hammer handle. Make sure that the string can’t slip off the handle.
Firstly, check that the floor under your table can handle the hammer to fall on it without breaking. You don’t want to break your kitchen tiles or dent a wooden floor! Resting the hammer handle on towards the tip of the ruler, place the hammer’s head under the desk and the other end of the ruler on the desk surface. Whilst supporting the hammer, slide the string along the ruler until you can feel that the ruler can support the hammer’s weight. Carefully take your hand away from under the hammer and you should find that your contraption balances itself! Going further How far can you move the ruler towards the end of the desk? Do you have to adjust the string’s placement? Why?
Get the Unit of Work on Forces here! Push, pull Friction & spin! From inertia to centripetal force, this unit covers many concepts about Newton’s Laws! Includes cross-curricular teaching ideas, student quizzes, a sample marking rubric, scope & sequences & more
School science visits since 2004! – Curriculum-linked & award-winning incursions. – Over 40 primary & high school programs to choose from. – Designed by experienced educators. – Over 2 million students reached. – Face to face incursions & online programs available. – Early learning centre visits too!
Forces, Friction & Movement Years K to 6 Maximum 30 students School workshop 60 or 90 minutes Online Class Available Read More Enquire Now
Be Amazing! How to teach science, the way primary kids love. $29.95 inc. GST View Details Add to Cart Trustpilot
STEM Full Day Accelerator - Primary Designed from real classroom experiences, this modular day helps you create consistently effective science learning that directly address the new curriculum with easily accessible and cost-effective materials. Read More Enquire Now
Designed from real classroom experiences, this modular day helps you create consistently effective science learning that directly address the new curriculum with easily accessible and cost-effective materials.
Hands-on Kids Science Party >20 hands on science experiments Gigantic bubbles Slime making Professional science show Read More
This website uses cookies to improve user experience. By using our website you consent to all cookies in accordance with our Cookie Policy.
Thank you for looking to subscribing to our newsletter 🙂 Through this service you’ll be first to know about the newest free experiments, science news and special offers. PLUS: Get a free Kitchen Chemistry Booklet with >20 experiments, how to use variables plus a handy template!
Please fill out the details below and an email will be sent to you. Once you get that just click on the link to confirm your subscription and you're all done!