Sometimes it takes a just little toy to get kids excited about physics. During a segment on ball bearings, I could see the children beginning to get distracted as recess approached.
“Hmm, I wonder what else has tiny metal balls in it, that helps it move or even spin around. Really really fast. And for ages and ages…..”
At every pause, more faces lit up. Hands shot into the air, shaking with excitement. Each student desperately trying to shout out the answer. Never have I seen so many school children so eager to contribute and participate in a discussion about reducing friction in order to optimise movement.
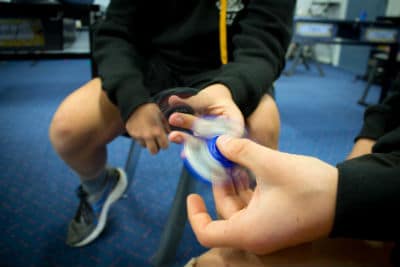
Photo by Catherine Heuzenroeder for ABC Riverland
The fidget spinner is the latest fad toy to have over the past few months. It is marketed as a tool to help kids concentrate by using them as a stress-relieving mechanism. Some teachers find them overwhelmingly distracting for their class, others are not bothered by them and even use one themselves. Regardless of your stance on the fidget spinner, we have some great teaching tips for the next time you see one appear during your science lesson!
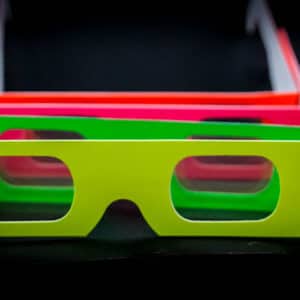
What is it made of?
Fidget spinners can come in a variety of shapes and colours. They can have 2, 3 or more prongs, and usually made of plastic or metal. You can also make your own! Why not make one out of candy so it’s also edible! But they mostly have one thing in common: a bearing in the centre. Here’s a tutorial for making a fidget spinner out of the super awesome element gallium, which is a metal that melts at body temperature and therefore easy to mold:
How does it work?
The bearing in the centre of the spinner is composed of an inner and an outer “race”, which are like tracks for tiny little metal balls between them to move around. The prongs or bits that stick out are connected to the outer race. When you put torque (a twisting force) on them, the outer race starts to rotate and the metal balls are able to reduce friction, allowing the spinning motion to continue much longer than usual.

We’ve seen it balanced on a pen, a finger, on your face or even a pet!
If you have the skills to keep the fidget spinner rotating in the same plane, then you can balance it on just about anything! What keeps it balanced as it’s spinning is conservation of angular momentum. When something is spinning, it will continue to do so until an external force or torque is acted upon it. Friction is one of those forces, which is why minimising it with ball bearings help the spinner spin for longer. Tilting the spinner or changing the plane at which it is spinning means you are applying external torque, so the spinner loses some of its “spinning energy” and will feel like it is struggling between your fingers. Wobbling has the same effect on a spinner. For a DIY fidget spinner it’s best to avoid this by having all the prongs or outer parts of the spinner well-balanced so that the centre of gravity is in the middle.
Other cool ideas
- Fidget spinners and magnets. What a combo! Check out this video for new tricks and new ways to explore the non-contacting forces of magnetism!
- Take it a step further and turn the spinner-magnet duo into a lesson in electromagnetism by adding a coil! Power LEDs for a spinning light show, or even charge your mobile phone on the go!
- Since it’s already spinning, this guy had the great idea of turning the fidget spinner into a zoetrope! Investigate how our eyes and brain work together to turn images into animation, and even let your students design their own. Here are all the instructions on how to make one if you are into 3D modelling.
Happy teaching,
Jaqueline Kao.

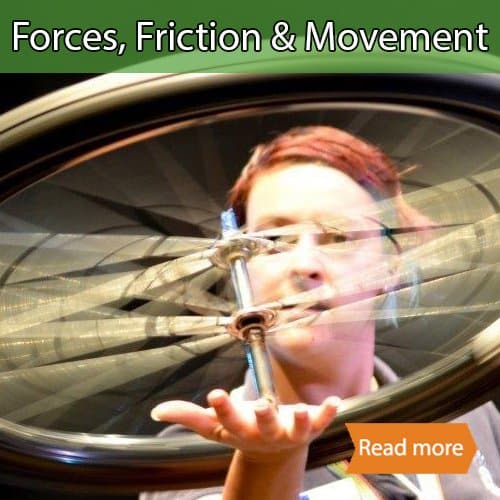
Learn more about ‘Forces, Friction and Movement’ with the Fizzics team!
NEW Primary science teaching book!
“Be Amazing! How to teach science, the way primary kids love”
![]()
Want more ideas for teaching science?
Subscribe to the FizzicsEd Podcast!


Calendar of Events

HIGH SCHOOL Science@Home 4-Week Membership 12PM: March 2024
![]() Feb 26, 2024 - Mar 29, 2024
Feb 26, 2024 - Mar 29, 2024
![]() 12PM - 12PM
12PM - 12PM
Price: $50 - $900

PRIMARY Science@Home 4-Week Membership 2PM: March 2024
![]() Feb 26, 2024 - Mar 22, 2024
Feb 26, 2024 - Mar 22, 2024
![]() 2PM - 2PM
2PM - 2PM
Price: $50 - $900
Light and Colour Online Workshop, Jan 18 PM
![]() Jan 18, 2024
Jan 18, 2024
![]() 2PM - 3PM
2PM - 3PM
Price: $50
Light and Colour Online Workshop, Jan 18 AM
![]() Jan 18, 2024
Jan 18, 2024
![]() 9AM - 11AM
9AM - 11AM
Price: $50
Lego Robotics, Sydney Olympic Park Jan 2024
![]() Jan 24, 2024
Jan 24, 2024
![]() 9AM - 12PM
9AM - 12PM
Price: $50
Creative Coding, Sydney Olympic Park Jan 2024
![]() Jan 24, 2024
Jan 24, 2024
![]() 1PM - 4PM
1PM - 4PM
Price: $50
Creative Coding, Sydney Olympic Park July 11 2023
![]() Jul 11, 2023
Jul 11, 2023
![]() 9AM - 4PM
9AM - 4PM
Price: $100

Fizzics Education STEAM Day: Robots vs Dinosaurs, Lalor, Apr 14
![]() Apr 14, 2023
Apr 14, 2023
![]() 9AM - 12PM
9AM - 12PM
Price: $45 - $50
Creative Coding, Sydney Olympic Park April 14 2023
![]() Apr 14, 2023
Apr 14, 2023
![]() 9AM - 4PM
9AM - 4PM
Price: $100
Science@Home After School 4-Week Membership: March 2023
![]() Mar 06, 2023 - Mar 31, 2023
Mar 06, 2023 - Mar 31, 2023
![]() 4PM - 5PM
4PM - 5PM
Price: $40 - $1200
Featured Articles
Topics
- Awards [14]
- Educhange [5]
- Music [3]
- Social Media [8]
- experiments [6]
- middle school [2]
- Inquiry-based learning [5]
- digital technologies [5]
- Earth science [2]
- Big History [1]
- Environment [40]
- NASA [6]
- Soils [1]
- seasonal [1]
- Artificial Intelligence [4]
- List [1]
- Games [1]
- Medicine [1]
- Biology [45]
- Events [46]
- National Science Week [3]
- Space Science [34]
- competitions [13]
- Sustainability [13]
- Student investigation [2]
- Social Emotional Learning [3]
- CAST test [1]
- Books [3]
- Farming [1]
- Outdoors [36]
- Sport [8]
- careers [11]
- UN SDGs [4]
- collaboration [1]
- Engineering [4]
- US Education [1]
- China [1]
- Food [5]
- Outreach [36]
- STEM [232]
- Physics [6]
- Global [2]
- K to 2 education [1]
- Virtual reality [2]
- citizen science [1]
- Churchill Fellowship [19]
- Gaming [8]
- Ozscied [2]
- Teaching [267]
- Chemistry [5]
- International [1]
- Photography [1]
- Play [1]
- numeracy [1]
- Cleveland [1]
- Gifted [7]
- Podcasts [119]
- Television [2]
- design thinking [8]
- Chinese student visits [1]
- Parenting [4]
- preservice teaching [5]
- Higher order thinking [1]
- Club [4]
- History [4]
- Pop Culture [4]
- Toys & Gadgets [1]
- project-based learning [5]
- Science & Technology Camps [1]
- Lesson ideas [1]
- Comedy [2]
- Philosophy [1]
- Coding [14]
- Indigenous [3]
- Preschool [24]
- Video Conferencing [40]
- family [2]
- Design [2]
- Lab Tech [1]
- math [1]
- Pakistan [1]
- Cooking [3]
- Kids [36]
- Remote Education [18]
- Virtual Excursions [9]
- Inclusive education [6]
- Oceans [6]
- Leadership [1]
- Electricity [1]
- Agritech [1]
- Dinosaurs [7]
- Kids Parties [5]
- Robotics [12]
- Edutech [26]
- Classroom management [1]
- video conference [1]
- special needs [1]
- scholarship [1]
- Botany [1]
- Apps [11]
- Distance Education [52]
- Kitchen Chemistry [7]
- Safety [2]
- Distance Learning [19]
- Student encouragement [2]
- online [5]
- image [1]
- Africa [1]
- English [1]
- Agriculture [5]
- Eastershow [2]
- Maker Space [11]
- Scicomm [141]
- primary education [46]
- STEAM [10]
- virtual [2]
- gamification [2]
- Asia Pacific [1]
- Art [17]
- Edchat [223]
- Maths [14]
- Scied [34]
- literacy [8]
- Higher education [4]
- Child online safety [1]
- Esports [1]
- Easter [1]
- Augmented Reality [4]
- Edtech [68]
- Media [18]
- Science [6]
- secondary education [46]
- teacher [1]
- dis [0]
- biotechnology [1]
- curriculum [2]
- AussieED [1]
- Education [216]
- Museums [31]
- Science News [4]
- Christmas [1]
- Vacation care [1]
- Film [1]
- computational thinking [2]
- high [1]


Comments