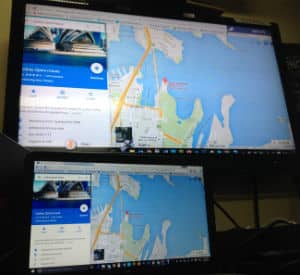
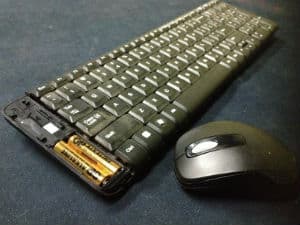
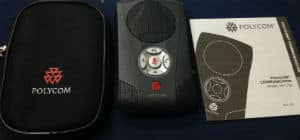
Top tips for teaching via video conference Follow FizzicsEd Articles: Comments 0 There are so many ways you can use video conferencing to discover new educational opportunities, from visiting world-class museums and zoos to diving on the coral reef! Still, often as a teacher you get your training on how to use the newly installed VC system and then you’re left to your own devices to work out the intricacies on how to use it. If your school timetable means that you don’t get to use your system for a couple of months you can quickly forget some of things you need to know to make your experience much more enjoyable (for both your students and for the far end site working with you). To help, here are a few tips that can help out when preparing for a virtual excursion, plus some simple hacks to make you look like a pro 🙂 Setting up your room Connect a computer to your system with a HDMI or AV connector. You’ll then be able to share all sorts of content with the remote students. If you want you can use an adapter to connect to your iPad so that you have a document camera with extra functionality. Have a remote mouse and keyboard at the table near you. That way you can access photos and applications easily. It’s useful to have a Google page open so that you can look things up on the fly as needed. Additionally, it can be helpful to have the batteries easily accessible so that if you run out of charge you can quickly change them over 🙂 Consider the placement of your audio. Try to get the microphones as close to the middle of the classroom as possible. Sometimes this is not feasible so in that case, you can have someone next to the microphone to relay questions and answers coming from the back of the classroom. VC systems come with a variety of noise cancelling microphones. If you choosing to run a web conference via your computer instead of a H.323 VC system it’s worth purchasing a USB noise cancelling microphone as the sound quality for the remote sites is far superior than what you usually get with your inbuilt microphone on your computer. Polycom C100 noise cancelling microphone Put a whiteboard right next to your TV or projector screen and list down the different schools who are attending (especially if you’re leading the conference). That way you can quickly glance to the list and know who you’re speaking with. It can really help if you have a magnetic button to that a volunteer can quickly slide along so you know who spoke to last! Before the conference Set your camera presets before joining the conference. This means a view of your entire classroom, a view of your experiment table and perhaps 3 separate views of the left, middle and right-side of the classroom. It can also help to have a whiteboard view as well so you can quickly write down things to show the other schools. How do you do this? Generally, if you zoom your camera to view you need you can hold down a number button on your VC remote and a preset will become stored for later use. Check your usual manual on how to switch between views (Polycom is slightly different to Cisco for instance). Learn how to toggle the various layout views from self-view and ‘Brady Bunch’ view. I personally like the self-view option as I can see exactly what the other schools are seeing and I simply toggle back to active speaker view so I can see the other schools when they speak back to me. It certainly helps me see what’s going on! VS. If there are windows in the room, close any drapes or blinds. Daylight is a variable light source and can conflict with interior room lighting. Try to avoid ‘back-lighting’ as you will come across as shadowy figures with your faces hidden. When adjusting your camera, try to fill the screen as much as possible with people rather than with the table, chairs, walls, lights, or the floor. People want to talk with people 🙂 For microphones not fixed to the ceiling or table, ensure they are at least 1 meter away from the video conference camera/endpoint and not near any other electronic equipment otherwise audio will be severely affected (think audio screech). Have the experiment materials and volunteers ready in your room so that the conference can be more interactive. Your student’s experience in video conferences is affected greatly by what they get to do. Imagine if you were a student and have to sit by and watch another school do fun science experiments in their room without you getting to have a go, all because your teacher’s plan is to run the experiments later. You wouldn’t have much fun and certainly would report to the teacher that you don’t like distance learning as much. Give your students the best chance to get the most out of the conference. Prime your students so that they’re ready to ask and receive questions during the conference. Some teachers get kids to research the content quite deeply and have a question written down so they don’t forget, just make sure that they don’t spend the time worrying about their time to speak and rather engage in the general conversation that occurs in the virtual excursion. During the conference Keep microphones muted until invited to speak by the presenter. Mute your microphone directly after speaking. There is always peripheral noise at schools and the microphones pick up everything. This is a big distraction to the presenter and other participating schools. Use your presets you setup earlier to show the other schools your students, your experiments and your classroom itself. It’s great to have a view setup for outside your window too – kids love to see outside as a peek into your world. Due to the nature of some school’s allocated broadband speed there is a chance of reduced clarity in picture. If a ‘dropout’ occurs simply redial into the conference. After the conference Like any lesson, this is the time to consolidate learning by asking questions with your students about the content presented and to run aligned follow-on lessons. The more you align a video conference with your standard learning sequence the more valuable it becomes. As with all things, the more you use it the more familiar you are with what you can do and therefore the better your experience in virtual excursions. Learning to run one of these systems can be fun if you contact a colleague in another school to try some test runs with you. Even better, get some of your own students to learn the controls which means that you won’t have to always rely on having to set it up yourself plus the students will get extra technology learning outcomes and confidence with using modern communications. If you need any help at all please feel free to drop me a line or you could have an in-depth read of my Churchill Fellowship report which details best practice in science education via video conference. Happy teaching Ben Newsome Love Science? Subscribe! Join our newsletter Receive more lesson plans and fun science ideas. PROGRAMS COURSES SHOP SCIENCE PARTIES Calendar of Events HIGH SCHOOL Science@Home 4-Week Membership 12PM: March 2024 Feb 26, 2024 - Mar 29, 2024 12PM - 12PM Price: $50 - $900 Book Now! PRIMARY Science@Home 4-Week Membership 2PM: March 2024 Feb 26, 2024 - Mar 22, 2024 2PM - 2PM Price: $50 - $900 Book Now! Light and Colour Online Workshop, Jan 18 PM Jan 18, 2024 2PM - 3PM Price: $50 Book Now! Light and Colour Online Workshop, Jan 18 AM Jan 18, 2024 9AM - 11AM Price: $50 Book Now! Lego Robotics, Sydney Olympic Park Jan 2024 Jan 24, 2024 9AM - 12PM Price: $50 Book Now! Creative Coding, Sydney Olympic Park Jan 2024 Jan 24, 2024 1PM - 4PM Price: $50 Book Now! Creative Coding, Sydney Olympic Park July 11 2023 Jul 11, 2023 9AM - 4PM Price: $100 Book Now! Fizzics Education STEAM Day: Robots vs Dinosaurs, Lalor, Apr 14 Apr 14, 2023 9AM - 12PM Price: $45 - $50 Book Now! Creative Coding, Sydney Olympic Park April 14 2023 Apr 14, 2023 9AM - 4PM Price: $100 Book Now! Science@Home After School 4-Week Membership: March 2023 Mar 06, 2023 - Mar 31, 2023 4PM - 5PM Price: $40 - $1200 Book Now! Featured Articles 13 quick ways to integrate technology into a primary science lesson Topics Augmented Reality [4] Edtech [68] Media [18] Science [6] secondary education [45] teacher [1] dis [0] biotechnology [1] curriculum [2] AussieED [1] Education [212] Museums [31] Science News [4] Christmas [1] Vacation care [1] Film [1] computational thinking [2] high [1] Awards [14] Educhange [5] Music [3] Social Media [8] experiments [6] middle school [2] Inquiry-based learning [5] digital technologies [5] Earth science [1] Big History [1] Environment [39] NASA [6] Soils [1] seasonal [1] Artificial Intelligence [4] List [1] Games [1] Medicine [1] Biology [44] Events [45] National Science Week [3] Space Science [33] competitions [13] Sustainability [12] Student investigation [2] Social Emotional Learning [1] CAST test [1] Books [3] Farming [1] Outdoors [36] Sport [8] careers [10] UN SDGs [4] collaboration [1] Engineering [4] US Education [1] China [1] Food [5] Outreach [35] STEM [228] Physics [6] Global [2] K to 2 education [1] Virtual reality [2] citizen science [1] Churchill Fellowship [19] Gaming [7] Ozscied [2] Teaching [266] Chemistry [5] International [1] Photography [1] Play [1] numeracy [1] Cleveland [1] Gifted [7] Podcasts [119] Television [2] design thinking [8] Chinese student visits [1] Parenting [4] preservice teaching [5] Higher order thinking [1] Club [4] History [4] Pop Culture [4] Toys & Gadgets [1] project-based learning [5] Science & Technology Camps [1] Lesson ideas [1] Comedy [2] Philosophy [1] Coding [14] Indigenous [3] Preschool [24] Video Conferencing [40] family [2] Design [2] Lab Tech [1] math [1] Pakistan [1] Cooking [3] Kids [36] Remote Education [18] Virtual Excursions [9] Inclusive education [6] Oceans [6] Leadership [1] Electricity [1] Agritech [1] Dinosaurs [7] Kids Parties [5] Robotics [12] Edutech [26] Classroom management [1] video conference [1] special needs [1] scholarship [1] Botany [1] Apps [11] Distance Education [51] Kitchen Chemistry [7] Safety [2] Distance Learning [19] Student encouragement [2] online [5] image [1] Africa [1] Agriculture [4] Eastershow [2] Maker Space [11] Scicomm [141] primary education [46] STEAM [10] virtual [2] gamification [1] Asia Pacific [1] Art [17] Edchat [223] Maths [14] Scied [34] literacy [7] Higher education [4] Child online safety [1] Esports [1] Easter [1] Load More Topics
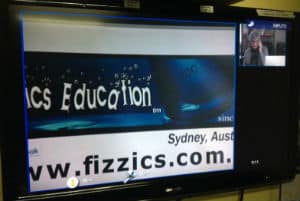
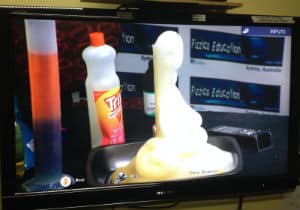
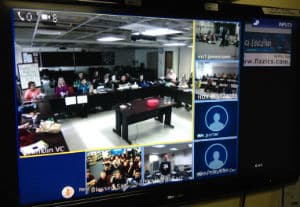
There are so many ways you can use video conferencing to discover new educational opportunities, from visiting world-class museums and zoos to diving on the coral reef! Still, often as a teacher you get your training on how to use the newly installed VC system and then you’re left to your own devices to work out the intricacies on how to use it. If your school timetable means that you don’t get to use your system for a couple of months you can quickly forget some of things you need to know to make your experience much more enjoyable (for both your students and for the far end site working with you). To help, here are a few tips that can help out when preparing for a virtual excursion, plus some simple hacks to make you look like a pro 🙂 Setting up your room Connect a computer to your system with a HDMI or AV connector. You’ll then be able to share all sorts of content with the remote students. If you want you can use an adapter to connect to your iPad so that you have a document camera with extra functionality. Have a remote mouse and keyboard at the table near you. That way you can access photos and applications easily. It’s useful to have a Google page open so that you can look things up on the fly as needed. Additionally, it can be helpful to have the batteries easily accessible so that if you run out of charge you can quickly change them over 🙂 Consider the placement of your audio. Try to get the microphones as close to the middle of the classroom as possible. Sometimes this is not feasible so in that case, you can have someone next to the microphone to relay questions and answers coming from the back of the classroom. VC systems come with a variety of noise cancelling microphones. If you choosing to run a web conference via your computer instead of a H.323 VC system it’s worth purchasing a USB noise cancelling microphone as the sound quality for the remote sites is far superior than what you usually get with your inbuilt microphone on your computer. Polycom C100 noise cancelling microphone Put a whiteboard right next to your TV or projector screen and list down the different schools who are attending (especially if you’re leading the conference). That way you can quickly glance to the list and know who you’re speaking with. It can really help if you have a magnetic button to that a volunteer can quickly slide along so you know who spoke to last! Before the conference Set your camera presets before joining the conference. This means a view of your entire classroom, a view of your experiment table and perhaps 3 separate views of the left, middle and right-side of the classroom. It can also help to have a whiteboard view as well so you can quickly write down things to show the other schools. How do you do this? Generally, if you zoom your camera to view you need you can hold down a number button on your VC remote and a preset will become stored for later use. Check your usual manual on how to switch between views (Polycom is slightly different to Cisco for instance). Learn how to toggle the various layout views from self-view and ‘Brady Bunch’ view. I personally like the self-view option as I can see exactly what the other schools are seeing and I simply toggle back to active speaker view so I can see the other schools when they speak back to me. It certainly helps me see what’s going on! VS. If there are windows in the room, close any drapes or blinds. Daylight is a variable light source and can conflict with interior room lighting. Try to avoid ‘back-lighting’ as you will come across as shadowy figures with your faces hidden. When adjusting your camera, try to fill the screen as much as possible with people rather than with the table, chairs, walls, lights, or the floor. People want to talk with people 🙂 For microphones not fixed to the ceiling or table, ensure they are at least 1 meter away from the video conference camera/endpoint and not near any other electronic equipment otherwise audio will be severely affected (think audio screech). Have the experiment materials and volunteers ready in your room so that the conference can be more interactive. Your student’s experience in video conferences is affected greatly by what they get to do. Imagine if you were a student and have to sit by and watch another school do fun science experiments in their room without you getting to have a go, all because your teacher’s plan is to run the experiments later. You wouldn’t have much fun and certainly would report to the teacher that you don’t like distance learning as much. Give your students the best chance to get the most out of the conference. Prime your students so that they’re ready to ask and receive questions during the conference. Some teachers get kids to research the content quite deeply and have a question written down so they don’t forget, just make sure that they don’t spend the time worrying about their time to speak and rather engage in the general conversation that occurs in the virtual excursion. During the conference Keep microphones muted until invited to speak by the presenter. Mute your microphone directly after speaking. There is always peripheral noise at schools and the microphones pick up everything. This is a big distraction to the presenter and other participating schools. Use your presets you setup earlier to show the other schools your students, your experiments and your classroom itself. It’s great to have a view setup for outside your window too – kids love to see outside as a peek into your world. Due to the nature of some school’s allocated broadband speed there is a chance of reduced clarity in picture. If a ‘dropout’ occurs simply redial into the conference. After the conference Like any lesson, this is the time to consolidate learning by asking questions with your students about the content presented and to run aligned follow-on lessons. The more you align a video conference with your standard learning sequence the more valuable it becomes. As with all things, the more you use it the more familiar you are with what you can do and therefore the better your experience in virtual excursions. Learning to run one of these systems can be fun if you contact a colleague in another school to try some test runs with you. Even better, get some of your own students to learn the controls which means that you won’t have to always rely on having to set it up yourself plus the students will get extra technology learning outcomes and confidence with using modern communications. If you need any help at all please feel free to drop me a line or you could have an in-depth read of my Churchill Fellowship report which details best practice in science education via video conference. Happy teaching Ben Newsome
This website uses cookies to improve user experience. By using our website you consent to all cookies in accordance with our Cookie Policy.
Thank you for looking to subscribing to our newsletter 🙂 Through this service you’ll be first to know about the newest free experiments, science news and special offers. PLUS: Get a free Kitchen Chemistry Booklet with >20 experiments, how to use variables plus a handy template!
Please fill out the details below and an email will be sent to you. Once you get that just click on the link to confirm your subscription and you're all done!